


Dehydrating and Rehydrating Sourdough Starter
Dehydrating Sourdough Starter
The long days of summer are known for many things, but baking sourdough bread may not be at the top of the list. Hot kitchens and vacations complicate the maintenance of the sourdough starter you have worked so hard to develop. You don’t want to toss it or just let it sit in the back of your refrigerator all summer, slowly acidifying to the point of no return. But there is an easy way to put your culture in “suspended animation” and bring it back to life when the bread baking bug bites again.
Dehydrating is easy, convenient, and the perfect long-term storage solution. It's also a great option if you plan on transporting your starter or sharing with friends. Dehydrating sourdough starter creates a shelf-stable starter with microorganisms held in an inactive/dormant state. In dehydrated form, the sourdough starter will last years. We had great success bringing back to life a 2-year-old dehydrated starter stored in a jar at room temperature. Within 5 days it was fully active and used to leaven bread.
Even if you don’t plan to take a break from baking, having some dehydrated starter on hand is still a good idea. If something accidentally happens to your starter, you will have a backup on hand. All you need to do to bring it back to life is to feed it with flour and water for a few days.
Time & Temperature
Dehydrate at 88 °F / 31 °C for 4 – 6 hours
Equipment
- Brod & Taylor Sahara Folding Dehydrator
- Brod & Taylor Silicone Baking Mat
- Spatula or bowl scraper
- Airtight container
Instructions
Before you begin:
Dehydrating sourdough starter will reduce the microbe population numbers, therefore it is best to start with a recently fed, healthy starter near peak activity. Doing so will set you up for better success when rehydrating. The more yeast and bacteria you start with, the more you are likely to be left with after drying, and the easier it will be to revive in the future.
Steps:
1. Spread the starter out on a silicone baking mat as thinly as possible. Use an offset spatula, bowl scraper, pastry brush, or any tool that will allow you to get a very thin layer. (Note: We found that 75 grams of 100% hydration sourdough starter spread very thinly covered one Brod and Taylor Silicone Baking Mat)
2. Place the silicone mat into the dehydrator and dry at 88 °F for 4 - 6 hours, or until completely dry. This may take more time depending on how thinly it is spread.

Spreading a thin layer of starter on a silicone mat

The dried starter in the dehydrator

Close-up of dehydrated starter
3. Break the dried starter into small pieces or grind it into powder for storage.
4. Store in an airtight container (glass jar, plastic bag, plastic container) out of direct sunlight and direct heat. Optional - the dehydrated starter may also be kept in the refrigerator or the freezer.

Jars of dehydrated sourdough starter sealed for storage
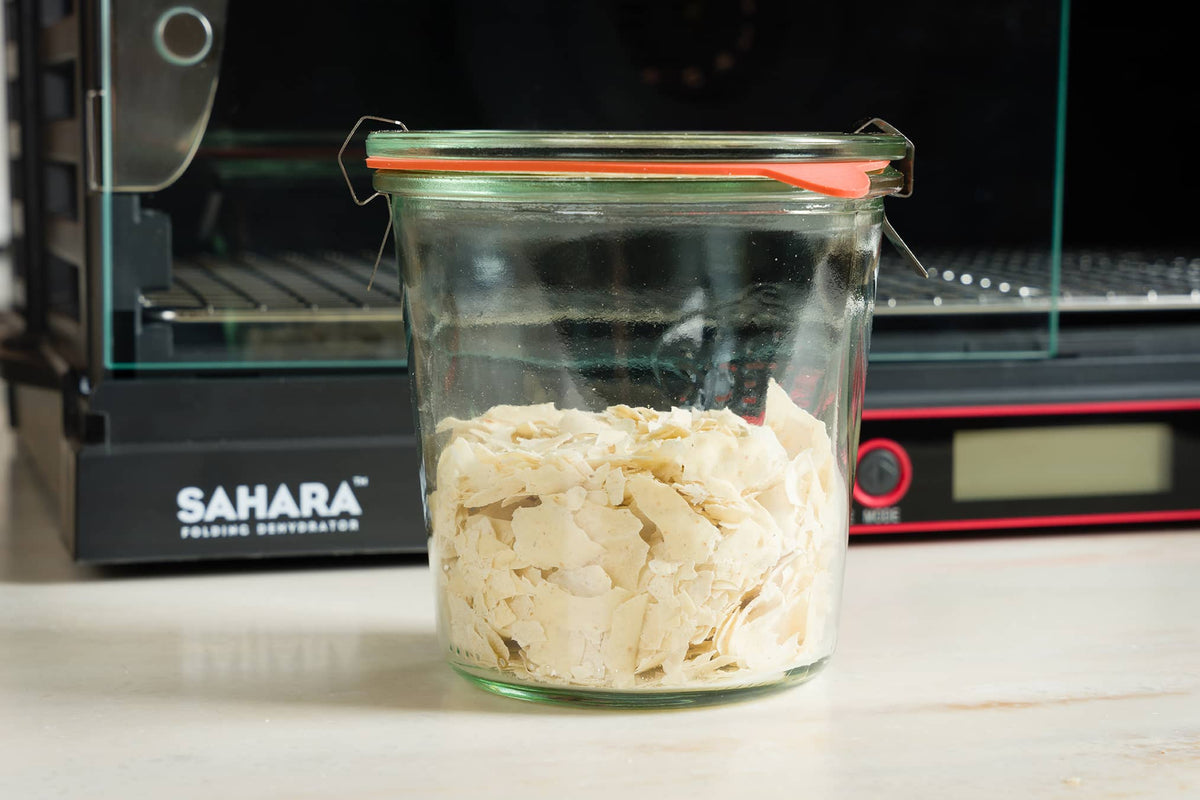
A single jar of dehydrated sourdough starter sealed for storage
Rehydrating Sourdough Starter
Time & Temperature
4 - 6 days with the Sourdough Home or Proofer set to 78 °F / 25 °C
Equipment
- Brod & Taylor High Capacity Baking Scale or Brod & Taylor Precision Scale
- Brod & Taylor Sourdough Home or Brod & Taylor Folding Proofer
- Small bowl or a jar
- Spatula
Instructions
A few days before you want to use your starter for baking, revive your dehydrated starter. Either the Sourdough Home or Folding Proofer can be used to keep the starter warm.
DAY 1
- In a small bowl or jar, mix 5 grams of dehydrated sourdough starter with 15 grams of 80 °F water.
- Allow the starter and water to sit for about 2 hours, or until the dried starter dissolves.
- Stir in 15 grams of flour.
- Cover and put in the Sourdough Home or Proofer at 78 °F overnight, or for 12 - 14 hours.

5 grams of dried starter

Dried starter dissolved in 15 grams of water

With 15 grams of flour added
DAY 2
There may not be visible signs of activity at this point.
- Without discarding any of what is in the jar, stir in 10 g of flour and 10 g of water.
- Return to the 78 °F Sourdough Home or Proofer.
DAY 3
You may begin to see signs of activity at this point such as small bubbles and a slightly sour aroma.
- Without discarding any of what is in the jar, stir in 10 g of flour and 10 g of water.
- Return to the 78 °F Sourdough Home or Proofer.
DAY 4
You should see clear signs of activity at this point. The starter will have risen since the last feeding and you will see bubbles.

Day 4 before feeding: signs of activity
are showing, bubbles are visible
- Discard all but 15 g of the starter.
- To the 15 g of starter add 30 g of water and 30 g of flour.
- Return to the 78 °F Sourdough Home or Proofer until the next day.
DAY 5
Your starter should be very active at this point. It will have doubled in size, be very bubbly, and smell sweet with just a hint of sourness. By Day 5 your starter will be very active. The time it takes to peak will have shortened from the previous days. In our experience, 7 hours after the day 5 AM feeding the starter had just about tripled in size.
IN THE AM
- Discard all but 15 g of the starter.
- To the 15 g of starter, add 30 g of water and 30 g of flour.
- Return to the 78 °F Sourdough Home or Proofer.
IN THE PM
- Check your starter around the 7-hour mark. If it has close to tripled in size, then repeat the same feeding as you did in the AM. If it has not yet peaked, let it go another hour or two before checking again.
- At this point, your starter should be active enough to bake with. (We had great success making a levain from the starter at this point that was used in the dough the next day.)
DAY 6
The starter should be fully active at this point.
How does rehydrating sourdough starter compare to starting a sourdough culture from scratch?
Is there an advantage to rehydrating a dried sourdough starter rather than building one from scratch? Yes. A side-by-side comparison of rehydrating dried sourdough versus building a starter from scratch showed a noticeable difference in the time to mature. From our experiments, we found the rehydrated starter reached a vigorous healthy state much sooner than the starter built from scratch. The rehydrated starter was close to tripling in size by Day 5, whereas the starter from scratch has only risen very slightly. The starter from scratch lagged behind the rehydrated starter until the Day 13 mark when they were both rising and falling predictably and showing the signs of the same activity level. Conditions were kept the same for each starter- same seed amounts, same feeding, and same temperature.

Day 4 comparison of starter made from scratch and rehydrated starter. The rehydrated starter is visibly more active.
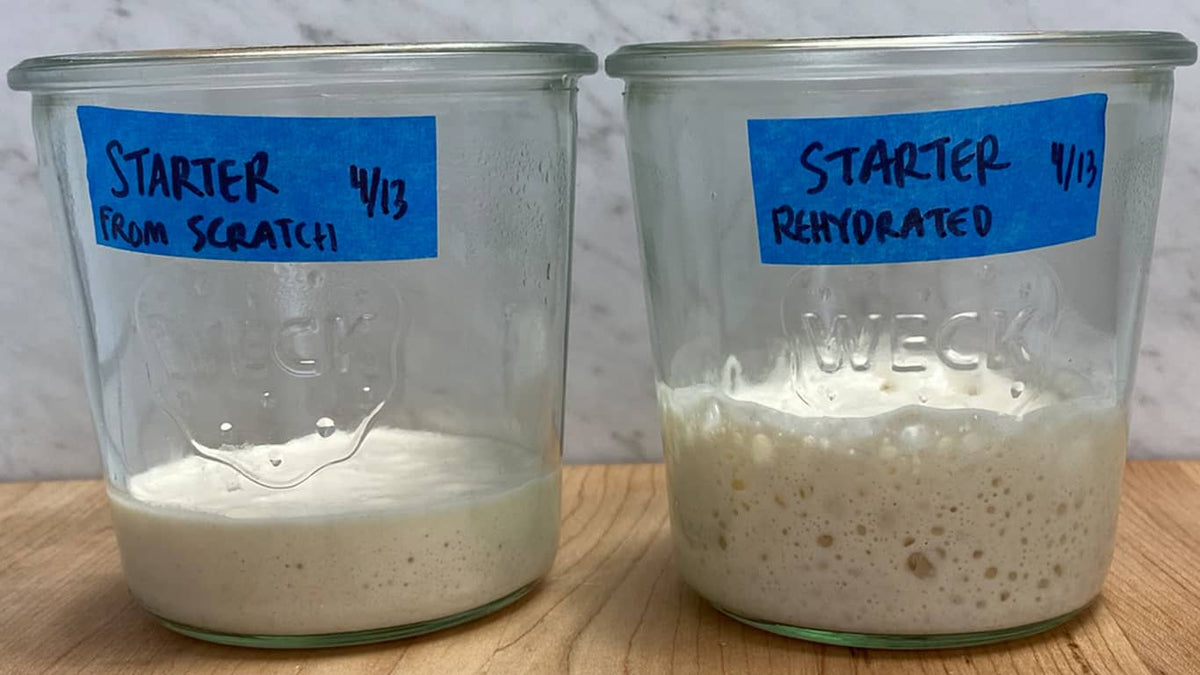
Day 5 comparison of starter from scratch and rehydrated starter in the morning before the daily feeding.

Day 5 comparison of starter from scratch and rehydrated starter 7 hours after being fed in the morning.


